Execution Layer for Odoo
The module, screen by screen.
The Execution Layer walkthrough: what you see after installing, the dashboard, the menu map, the 15-minute setup guide, and the settings that matter. Every screenshot is the real module on Odoo 19.
This walkthrough shows every screen of the Execution Layer, in the order you meet them. All screenshots are the real module, captured on a live Odoo 19 Enterprise instance with a seeded, fictional demo company; counts are demo traffic, and the demo company name is redacted from the window chrome. Everything renders identically on Community, except Enterprise-only models (such as Knowledge), which are simply absent.
The one-paragraph mental model
The Execution Layer is an MCP server that lives inside Odoo. AI clients connect, sign in as a real Odoo user, and every action, read or write, runs through one server-side pipeline: identity, policy, schema, meaning, preconditions, approval, idempotency, atomic execution, database read-back, verification, immutable audit, structured response. The effective permission is always the user’s own Odoo rights ∩ their bundle ∩ the connection’s level ∩ the token scope: every layer only narrows, so the AI never has more rights than the person it signs in as.
The menu map
Execution Layer├── Dashboard "Evidence": what AI did in your Odoo today├── Connections every AI connection · API keys · registered clients · Context Layer├── Approvals actions waiting for a human decision├── Evidence actions · record history · receipts · messages · exports · alerts├── Permissions (admin) users & permissions · bundles · allowed actions├── Rules (admin) required fields · preconditions · risk classes · alert rules · simulator├── Meaning (admin) registry · guided wizard · disambiguation rules└── Configuration (admin) setup guide · settings (incl. messaging switches)Menus are role-gated: a plain user sees only the Dashboard, their own Connections, their own Approvals, and their own Evidence. Everything marked admin requires the Administrator role. The four access levels, and what happens when one is revoked, are covered in users, bundles, and rules.
The dashboard: “Evidence”
- Getting-started strip. Five onboarding steps that tick off as you complete them: connect a client, say who may reach what, allow writes, add a rule, connect the Context Layer. The × dismisses it permanently for you; the same content stays under Configuration → Setup guide.
- Tiles. Actions, Writes (with their verified count), Refusals, Failed, Pending approvals, Alerts today, and Internal users. Every tile is clickable and opens the matching filtered list.
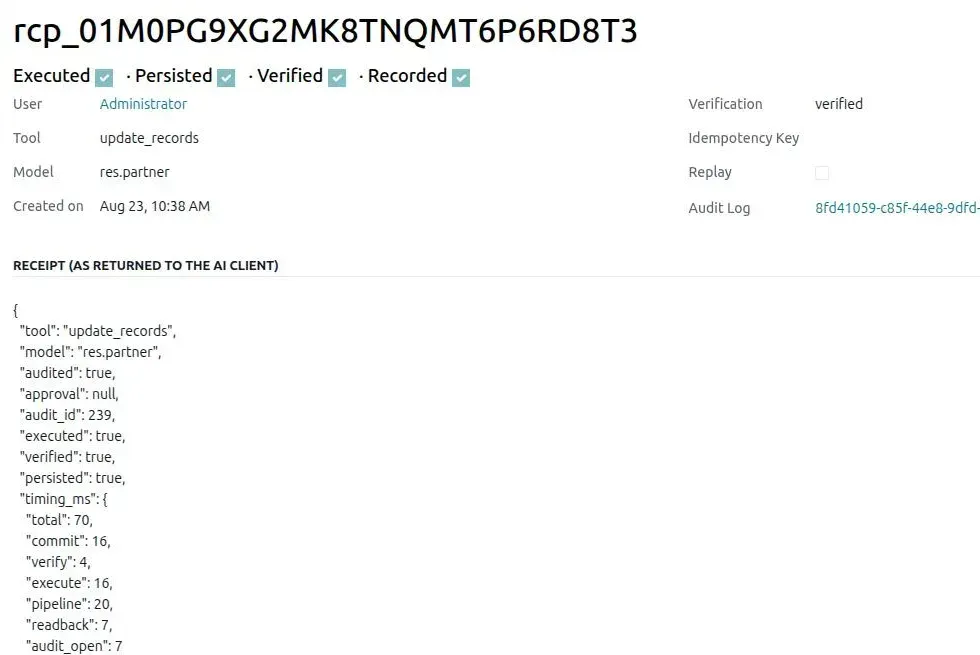
- Latest actions. The live feed of AI calls: who, tool, model, outcome. A successful write shows its receipt id; a call enriched with verified meaning carries a CONTEXT chip.
- Context Layer panel. The connection status (connected, degraded, not connected), how many answers were enriched with verified meaning in the last 7 days, and an honest note about ambiguity and unknown-term refusals.
- Refusals by code. The 7-day distribution of why calls were refused, straight from the structured error codes.
- Evidence panel. Recording on or off, strict mode, immutable mode, the retention window, and the installed modules as chips.
Everything on this screen is factual. No promotional prose is ever injected into AI responses or into the dashboard.
The setup guide: about 15 minutes
The module installs read-only and already recording: AI cannot write anything, and every call is leaving evidence from the first minute. The Setup guide (Configuration → Setup guide) walks an administrator through the rest:
- Bundle: choose a starting role preset; the default is read only.
- Connect: copy the per-client snippet (Claude Code, Claude Desktop, ChatGPT, Cursor, or a generic MCP client) and complete the OAuth sign-in. Details in connecting an AI client.
- First read: run one governed read and watch it appear in the action log.
When you are ready to let AI write, turn on Configuration → Settings → Allow writes for AI clients. Every write from then on is verified, receipted, and recorded.
Settings
The Settings screen (Configuration → Settings) carries the switches an administrator owns: the
MCP server URL (read-only, always https://<your-odoo>/nanti/mcp), the Allow writes
switch (off after install), strict evidence mode, rate limits, read and export size caps,
OAuth token lifetimes, toggles for dynamic client registration and consent remembering, and the
messaging switches: Discuss, WhatsApp (off by
default), free-form WhatsApp, @everyone, the bulk threshold, and hourly send caps.
Why the /nanti/ prefix
The endpoint and the OAuth routes live under /nanti/ so the module coexists with any other
MCP module on the same database. Generic /mcp and /oauth/* routes collide between
vendors; vendor-namespaced ones never do.
Next: connections and the Context Layer, the screens where AI clients arrive.